AWS Tailscale Router
— Networking, AWS, Infrastructure — 4 min read

I have an opinion that infrastructure changes are best achieved when processes are fully thought out. With that said, I think a good investment in how we deploy and interact with systems pays dividends down the road.
One of the first things that I felt I needed to setup when working on projects was a uniform way that I could access the systems I made. With that thought in mind I started creating this AWS Tailscale Router. The router allows for secure access to future systems that I have in mind. Anything I attach to my AWS VPC I can configure the router to have access and all I would need to change is adding the subnets to the instance running the router and give my Tailscale group availability in the ACL.
Prerequisites
You will need these resources to replicate:
- An AWS account
- A VPC and subnets ready to use for the EC2 instance
- A free Tailscale account
EC2 instance
I started by creating an EC2 instance to host the router in. I gave it a dedicated public IP and put it in a subnet for public facing services.
There were three major parts to creating this in AWS.
KMS key pair:
# Generates a secure private key and encodes it as PEMresource "tls_private_key" "key_pair" { algorithm = "RSA" rsa_bits = 4096}# Create the Key Pairresource "aws_key_pair" "key_pair" { key_name = "linux-key-pair" public_key = tls_private_key.key_pair.public_key_openssh}# Save fileresource "local_file" "ssh_key" { filename = "${aws_key_pair.key_pair.key_name}.pem" content = tls_private_key.key_pair.private_key_pem}Running this creates a local file for the private key used to access the EC2 instance and you will need it to ssh later.
Security group:
# Define the security group for the Tailscale Relayresource "aws_security_group" "tailscale-relay-sg" { name = "tailscale-relay-sg" description = "Allow ssh into tailscale relay" vpc_id = var.vpc.vpc_id
# This should be commented out after setting up the router ingress { from_port = 22 to_port = 22 protocol = "tcp" cidr_blocks = ["0.0.0.0/0"] description = "Allow incoming SSH connections" }
egress { from_port = 0 to_port = 0 protocol = "-1" cidr_blocks = [{{ subnet1 }}, {{ subnet2 }}, {{ subnet3 }}] description = "Outbound all" }}We need the ingress block to be able to ssh and setup the Tailscale router. After running tailscale up later you can remove it so it
isn't open for ssh to the whole world.
EC2 instance:
locals { linux_instance_type = "t2.micro" linux_associate_public_ip_address = true linux_volume_size = 15 linux_volume_type = "gp2"}
# Get latest Ubuntu Linux Bionic Beaver 18.04 AMIdata "aws_ami" "ubuntu-linux-1804" { most_recent = true owners = ["099720109477"] # Canonical filter { name = "name" values = ["ubuntu/images/hvm-ssd/ubuntu-bionic-18.04-amd64-server-*"] } filter { name = "virtualization-type" values = ["hvm"] }}
# Create EC2 Instanceresource "aws_instance" "tailscale_relay_instance" { ami = data.aws_ami.ubuntu-linux-1804.id instance_type = local.linux_instance_type subnet_id = var.dynamic_subnets.az_public_subnets_map.us-west-2a[0] vpc_security_group_ids = [aws_security_group.tailscale-relay-sg.id] associate_public_ip_address = true source_dest_check = false key_name = aws_key_pair.key_pair.key_name user_data = file("aws-user-data.sh") # root disk root_block_device { volume_size = local.linux_volume_size volume_type = local.linux_volume_type delete_on_termination = true encrypted = true }}You will need to add aws-user-data.sh:
#! /bin/bashsudo apt-get updateI kept this part simple because I imagine I will be updating the advertised routes in the instance a lot, but you can add in the
tailscale up later in the blog post to this script to avoid ssh'ing into the machine.
Once all of that is spun up, you should have an EC2 instance with a publicly accessible IP. Now ssh into your instance with the private key you created:
ssh -i {{ path_to_private_key }} root@{{ public_ip_address }}Then configure the Tailscale router to advertise the internal routes available to it.
echo 'net.ipv4.ip_forward = 1' | sudo tee -a /etc/sysctl.d/99-tailscale.confecho 'net.ipv6.conf.all.forwarding = 1' | sudo tee -a /etc/sysctl.d/99-tailscale.confsudo sysctl -p /etc/sysctl.d/99-tailscale.conf
sudo tailscale up --advertise-routes={{ subnet1 }},{{ subnet2 }},{{ subnet3 }}You should get a prompt to link the tailscale up to your account. Follow it and it should show up as a Machine in your account. From there, all that is
left is to configure your Tailscale ACL.
{ // Declare static groups of users beyond those in the identity service. "groups": { "group:dev": ["{{ email_on_tailscale_account }}"], },
// Declare convenient hostname aliases to use in place of IP addresses. "hosts": { "tailscale-relay": "{{ router_public_ip }}", },
// Access control lists. "acls": [ { "action": "accept", "src": ["group:dev"], "dst": ["tailscale-relay:*", "{{ subnet1 }}:*", "{{ subnet2 }}:*", "{{ subnet3 }}:*"], }, ],}You're now ready to connect to instances in your AWS account.
Connecting to Tailscale
You will need to install Tailscale on your computer to access the resources available to the router. You can follow their instructions for installing for your case.
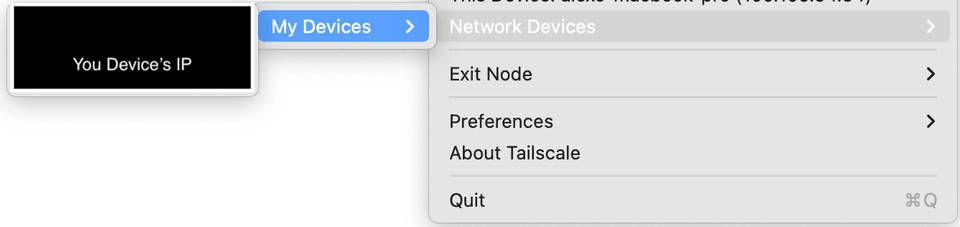
Tailscale Devices
When everything is completed, you should see your device in your Tailscale connecter.